1.Observation Identify an “intangible” interactive system that is replacing what used to be “tangible.” Some literal examples of this from our building (370 Jay) would be: automatic faucet, towel dispenser, automatic doors, card entry gates, etc., while it can be anything from your everyday life, memory, or even imagination. It can be an object, system, conversation, landscape, art, non-art, design, metaphor, or something else.
Object to be Destroyed / Object of Destruction by May RayAutomatic High Beam (AHB)
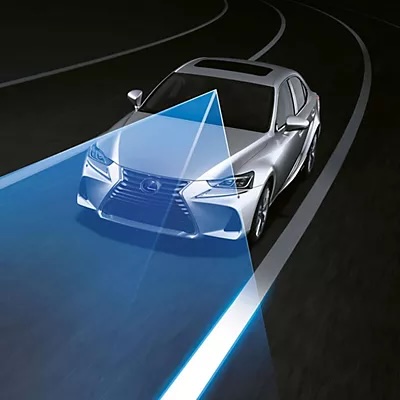
One intangible interaction system that I encounter on a near daily basis is a system embedded in my car, a 2022 Toyota RAV4 Prime. I live in a rural area where there's nearly zero ambient light so when I drive at night it's critical that I have my high beam headlights on. It's important to be on high alert for deer and other wildlife crossing roadways and high beams help me clearly on these dark winding country roads. One issue with high beam lights is that they're incredibly distracting and potentially blinding for other drivers at risk of being blasted by them. Essentially that's any oncoming vehicles or those drivers immediately in front of you.
In the past, it was critical to be on alert to switch off the brights anytime a car was nearby. This added yet another thing to be mindful of when driving at night. Nowadays, most cars are equipped with technology to toggle the high beam lights on and off when necessary. It's crazy helpful!
With a little research, I was able to determine that in my particular car the system is called the Automatic High Beam (AHB) Function. Here's some details about it:
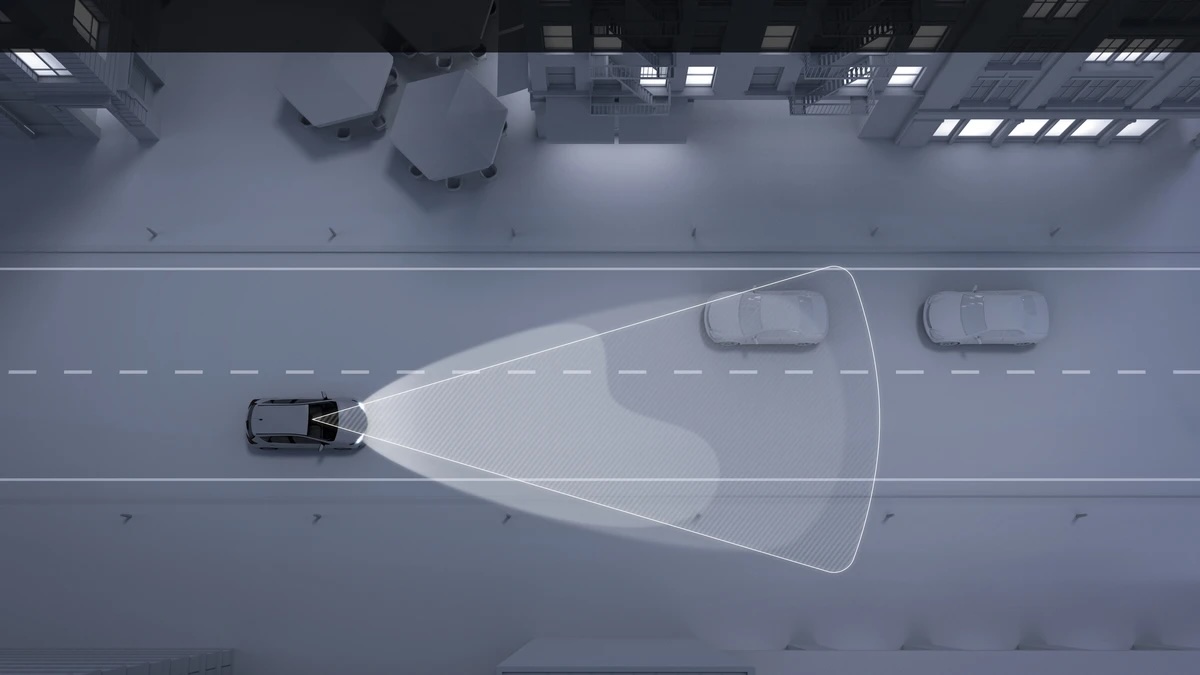
- The AHB function uses a windshield camera to detect the headlights and taillights of other vehicles.
- The AHB function automatically switches the headlights from low to high beams when another vehicle approaches, and back to low beams when the vehicle has passed.
- The AHB function operates at speeds above 25 mph.
- Factors like weather, lighting, terrain, and a dirty windshield can limit the effectiveness of the AHB function.
For the most part, It works exceedingly well with some exceptions:
1. In situations when you assume the function is engaged and it's not on. This really only occurs after the car has been borrowed or serviced and the "defaults" are adjusted. I've definitely gone entire evenings without realizing that the standard high beams are on and I've embarrassingly blasted many other drivers over the course of the night.
2. In some adverse weather events, the snow and ice built up on and around the windshield can impede the AHB function from properly recognizing other vehicles on the road. This usually means that the AHB function will not trigger and the high beams will stay on when they shouldn't. This unintended failure can also occur in heavy fog or rain but its less typical.
3. Tunnels and underpasses can sometimes present rapidly changing lighting situations. I've seen the system act erratically if lighting conditions are changing very quickly. It gets especially bad if you try to overcome by manually toggling the high beam lights on and off.
4. Curves and steep elevation changes are also known to impede the sensors from being able to properly detect cars in the periphery. In my car, this isn't too much of a problem but in some models, this may be more of an issue.
2.Research How does the sensing system work?
1/ Take a closer look at the system for some time and play with it by trying different actions. What did you find out? What is the most common error of the system?
2/ Search relevant information online. You can probably find tutorials or datasheet of the system or adjacent. Consider these questions: Which sensors are being use in the current systems using? How are they programmed? How are they embedded on the device? How do they decide when to activate (flushing, dispensing, making sound…)?
Teshima Art Museum by Office of Ryue Nishizawa
Toyota's official language is as follows:
Automatic High Beams (AHB) system*: Automatically switches between high and low beams as appropriate to enhance vision at night.
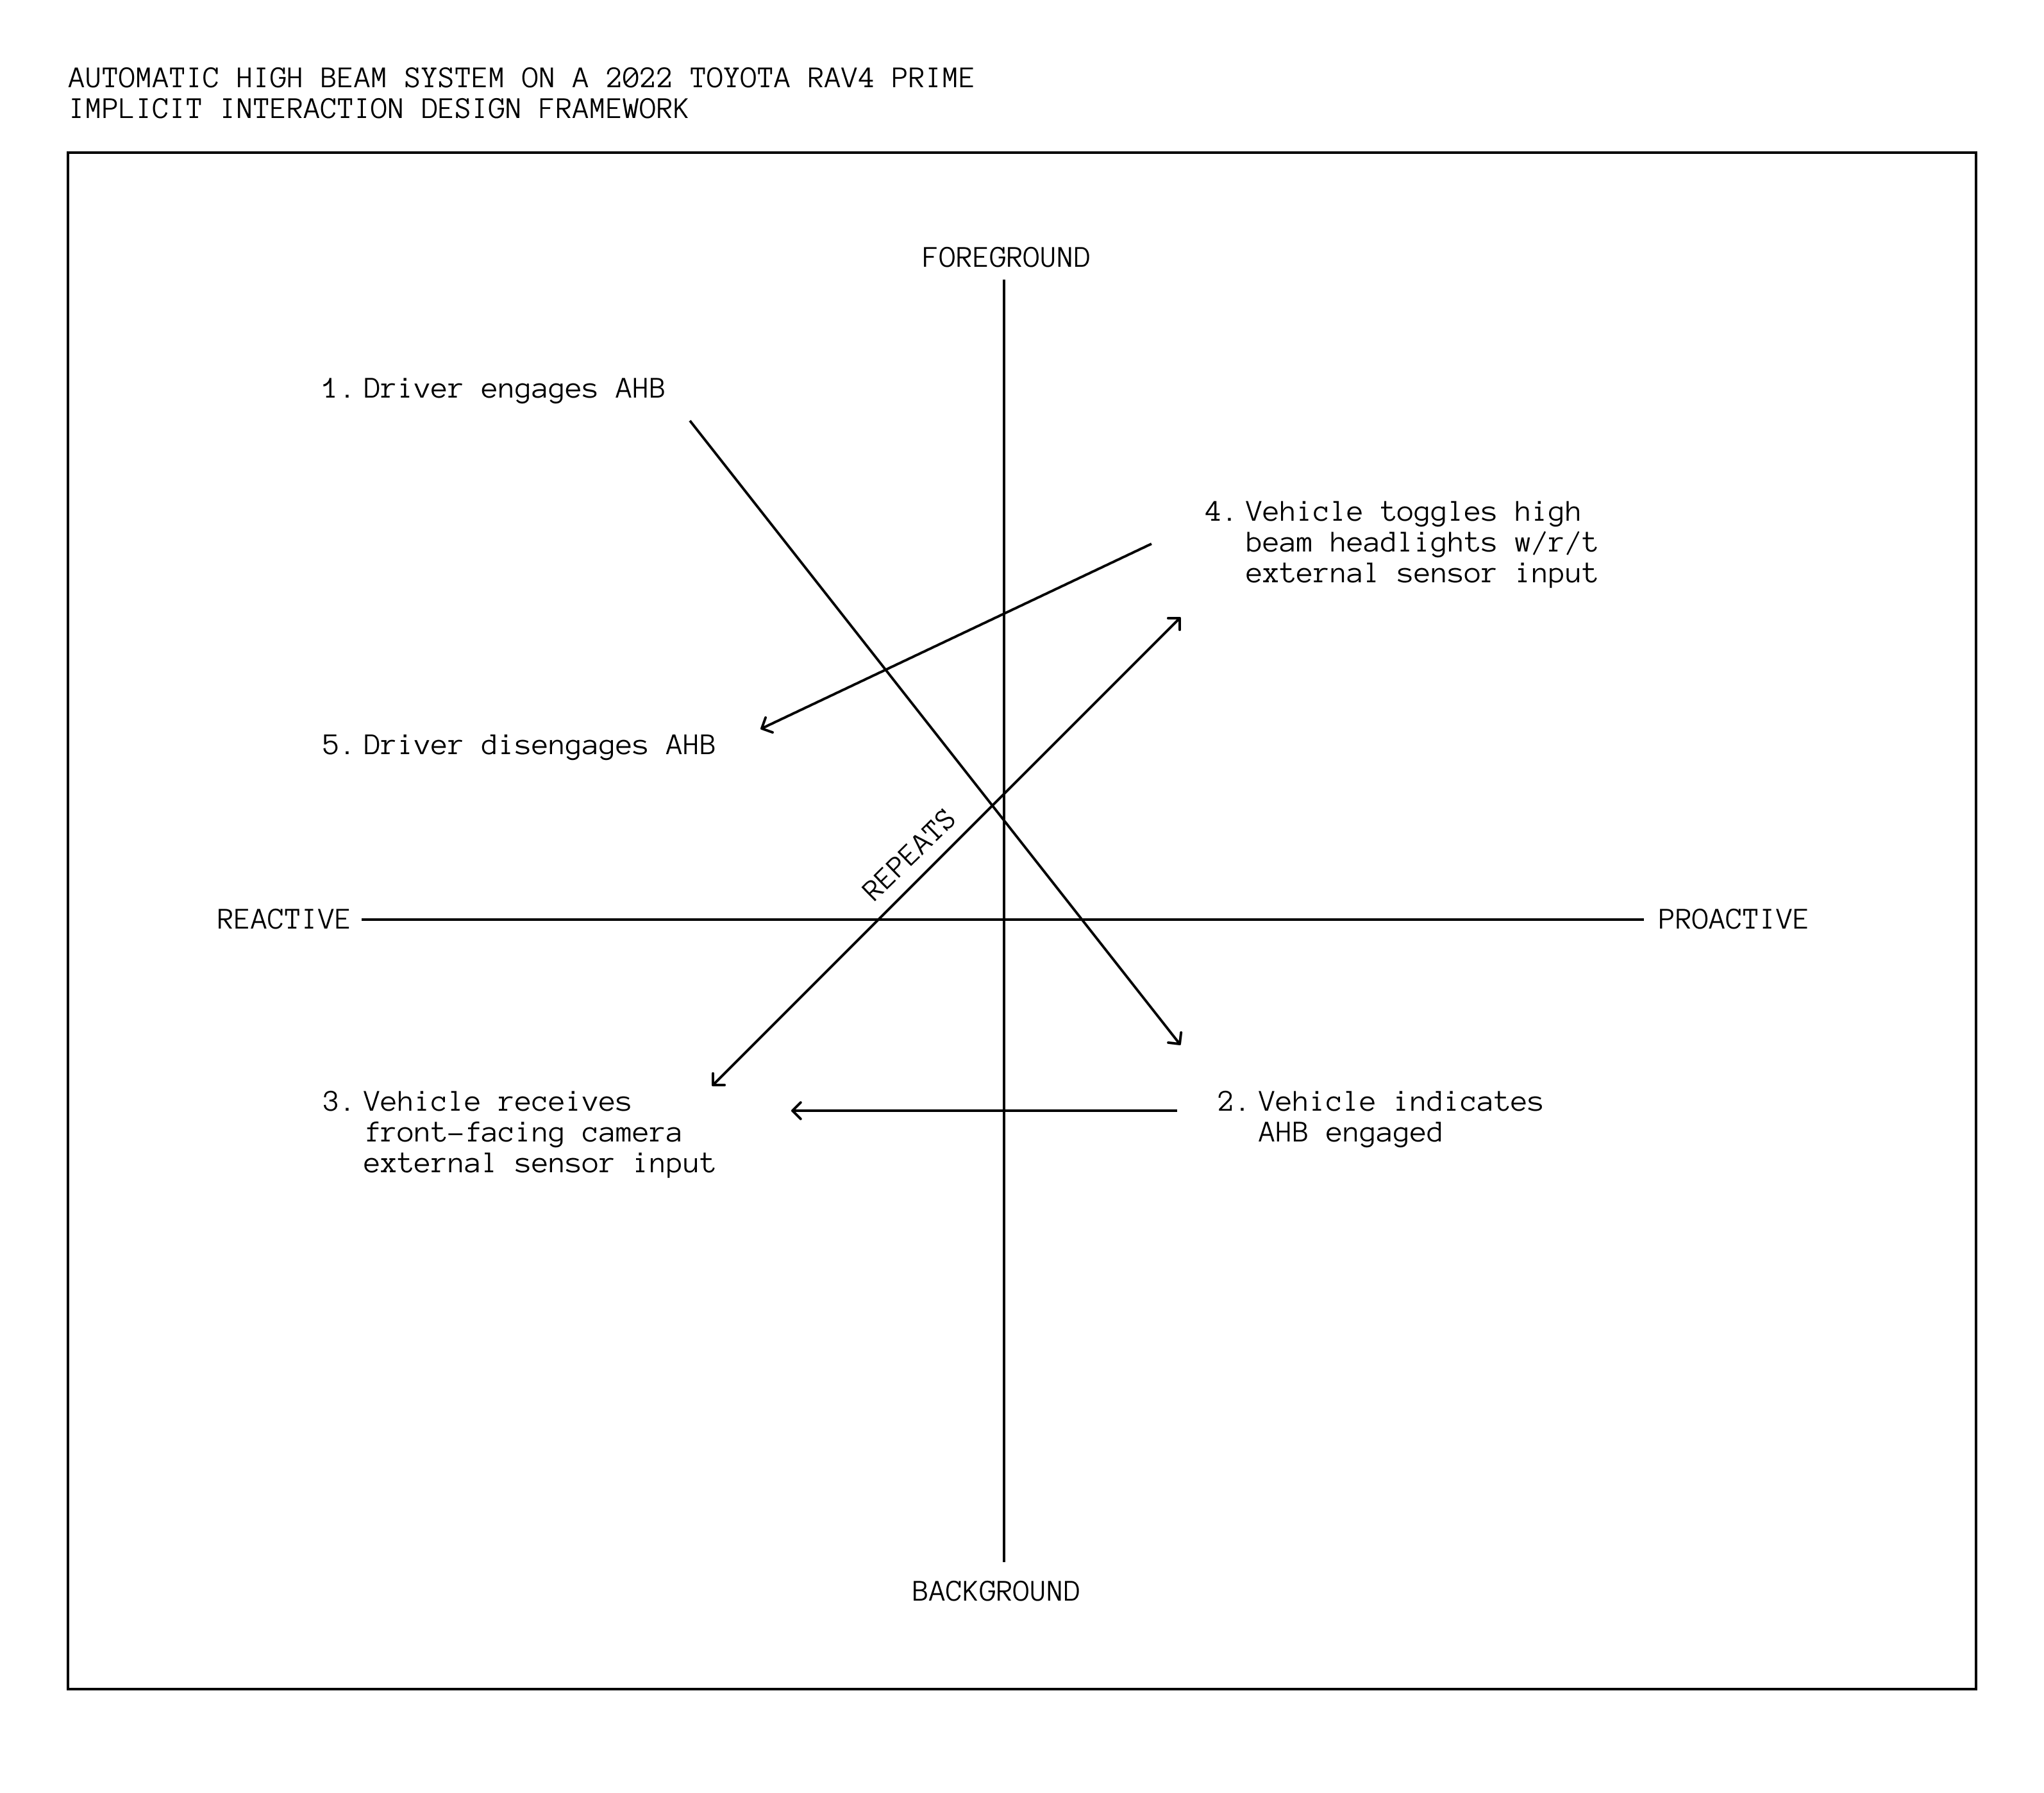
1. Activation:
- Automatic Mode: Ensure the headlight switch is set to the “AUTO” position.
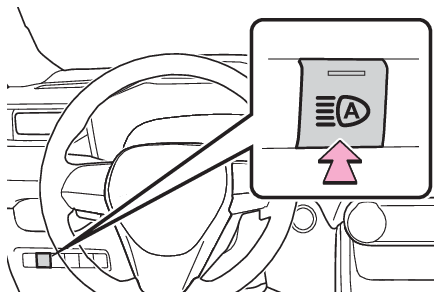
- AHB Switch**: Press the Automatic High Beam switch, usually located on the dashboard near the steering wheel. An indicator light will illuminate on the instrument panel, confirming that the system is active.
2. Operation:
- When driving above approximately 21 mph (34 km/h) in low-light conditions, the system will automatically engage the high beams.
- Upon detecting the headlights of an oncoming vehicle or the taillights of a vehicle ahead, the system will switch to low beams to prevent glare.
- Once the road is clear, the high beams will reactivate.
The system primarily relies on a Forward-Facing Camera as it's sensor. The AHB system utilizes this sensor to detect the headlights of oncoming vehicles and the taillights of preceding vehicles. This camera is typically mounted behind the rearview mirror, integrated into the upper portion of the windshield.
In spending as much time with the system as I have, I'm impressed at how well it avoids accidental triggers. The system rarely turns off when it isn't supposed to. Conversely, the system occasionally doesn't flip off the high beam lights when it should – I described this earlier. This is probably the biggest fault of the system.
.
I think one of the trickiest things about modern vehicles is the sheer volume of information that the driver is meant to process. On top of that, many of the symbols and buttons aren't very intuitive. Standardization across different manufacturers is not super common so it's always a struggle to get acquainted when you're in a rental car. In the past, this wouldn't have been much of a problem but with modern cars that are more "autonomous" many of the simple independent actions taken by the car can seem alarming and surprising to the passengers of the car.
I'm not one for overregulation, so symbol and function standardization across an array of manufacturers doesn't seem smart or realistic. That being said, I think the feedback to the driver could be improved. Currently, there is a rear-lit illuminated "A" symbol on the dashboard to indicate that that the function is engaged. There's a separate illuminated icon that shows whether the high beams are engaged in-real-time. It took me a while owning the car to realize what the "A" signified. Perhaps some additional user testing may help to identify what symbols are most intuitive to users. I'd start there.
In terms of improving the hardware functionality, I'm thinking about ways that we can prevent ice buildup around the front-facing camera. There might be a more ideal location that is shielded from snow or maybe the location that the camera is mounted could receive a low-energy conductive heat strip to ensure that ice and snow are rapidly melted in that immediate area. This might resemble something similar to how SpaceX Starlink satellites have on-board warming to ensure there are no satellite connectivity interrupts. 08 February 2025Proximity Sensor Research
Week 2
Project 2: Time of Flight Sensor
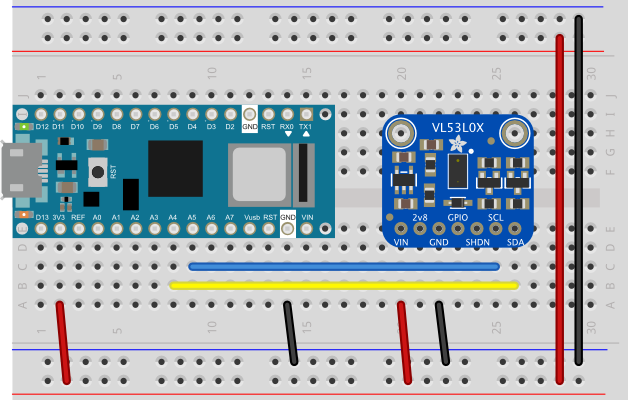
The Time of Flight sensor that I sourced for testing is the VL53L0X from Adafruit. Here’s some information direct from Adafruit:
The VL53L0X is a Time of Flight distance sensor like no other you've used! The sensor contains a very tiny invisible laser source, and a matching sensor. The VL53L0X can detect the "time of flight", or how long the light has taken to bounce back to the sensor. Since it uses a very narrow light source, it is good for determining distance of only the surface directly in front of it. Unlike sonars that bounce ultrasonic waves, the 'cone' of sensing is very narrow. Unlike IR distance sensors that try to measure the amount of light bounced, the VL53L0x is much more precise and doesn't have linearity problems or 'double imaging'
where you can't tell if an object is very far or very close.
This is the 'big sister' of the VL6180X ToF sensor, and can handle about 50 - 1200 mm of range distance. If you need a smaller/closer range, check out the VL6180X which can measure 5mm to 200mm.
Getting it set up was fairly straightforward. I followed the pinout diagram from Adafruit to connect it to my Arduino Nano.
I was able to grab the prebuilt library for this by searching for Adafruit_VL53L0X within the Arduino IDE library. Also straightforward. Once there, I fired up one of the example code files. This was the readout from me arbitrarily waving my hand over the sensor – looks like we’ve got a connection!
Despite it being advertised as being able to detect up to 1200 mm of range, I found that it stopped being able to sense anything reliably after 500mm. It started giving me “out of range” errors consistently at about that point. I found that the sensing angle was roughly 15 degrees. When I tested how accurate the sensor was at providing a known distance, it seemed to provide a reading that was almost exactly 50% of what it should have been. I wonder if there is some calibration issue happening? I held something at 600mm and it gave me a readout floating around 300mm. Perhaps this has something to do with the way that it doesn’t give me anything reliable after 500 mm? Not sure what exactly is going wrong but I’m having a fair amount of trouble making this thing cooperate!
11 February 2025Curious Cube
Assignment # 3
I thought it’d be interesting to play with shared experience for my Curious Cube exploration. We all experience and interact with the same people, places, things and ideas but those things are ever-changing around us. Likewise, our personal lived experience is so personal to us that only we can truly understand our worldview –– and even then, it’s often clouded and misunderstood even in our own minds. What if a simple, playful experiment could nudge on these ideas?
Concept 1
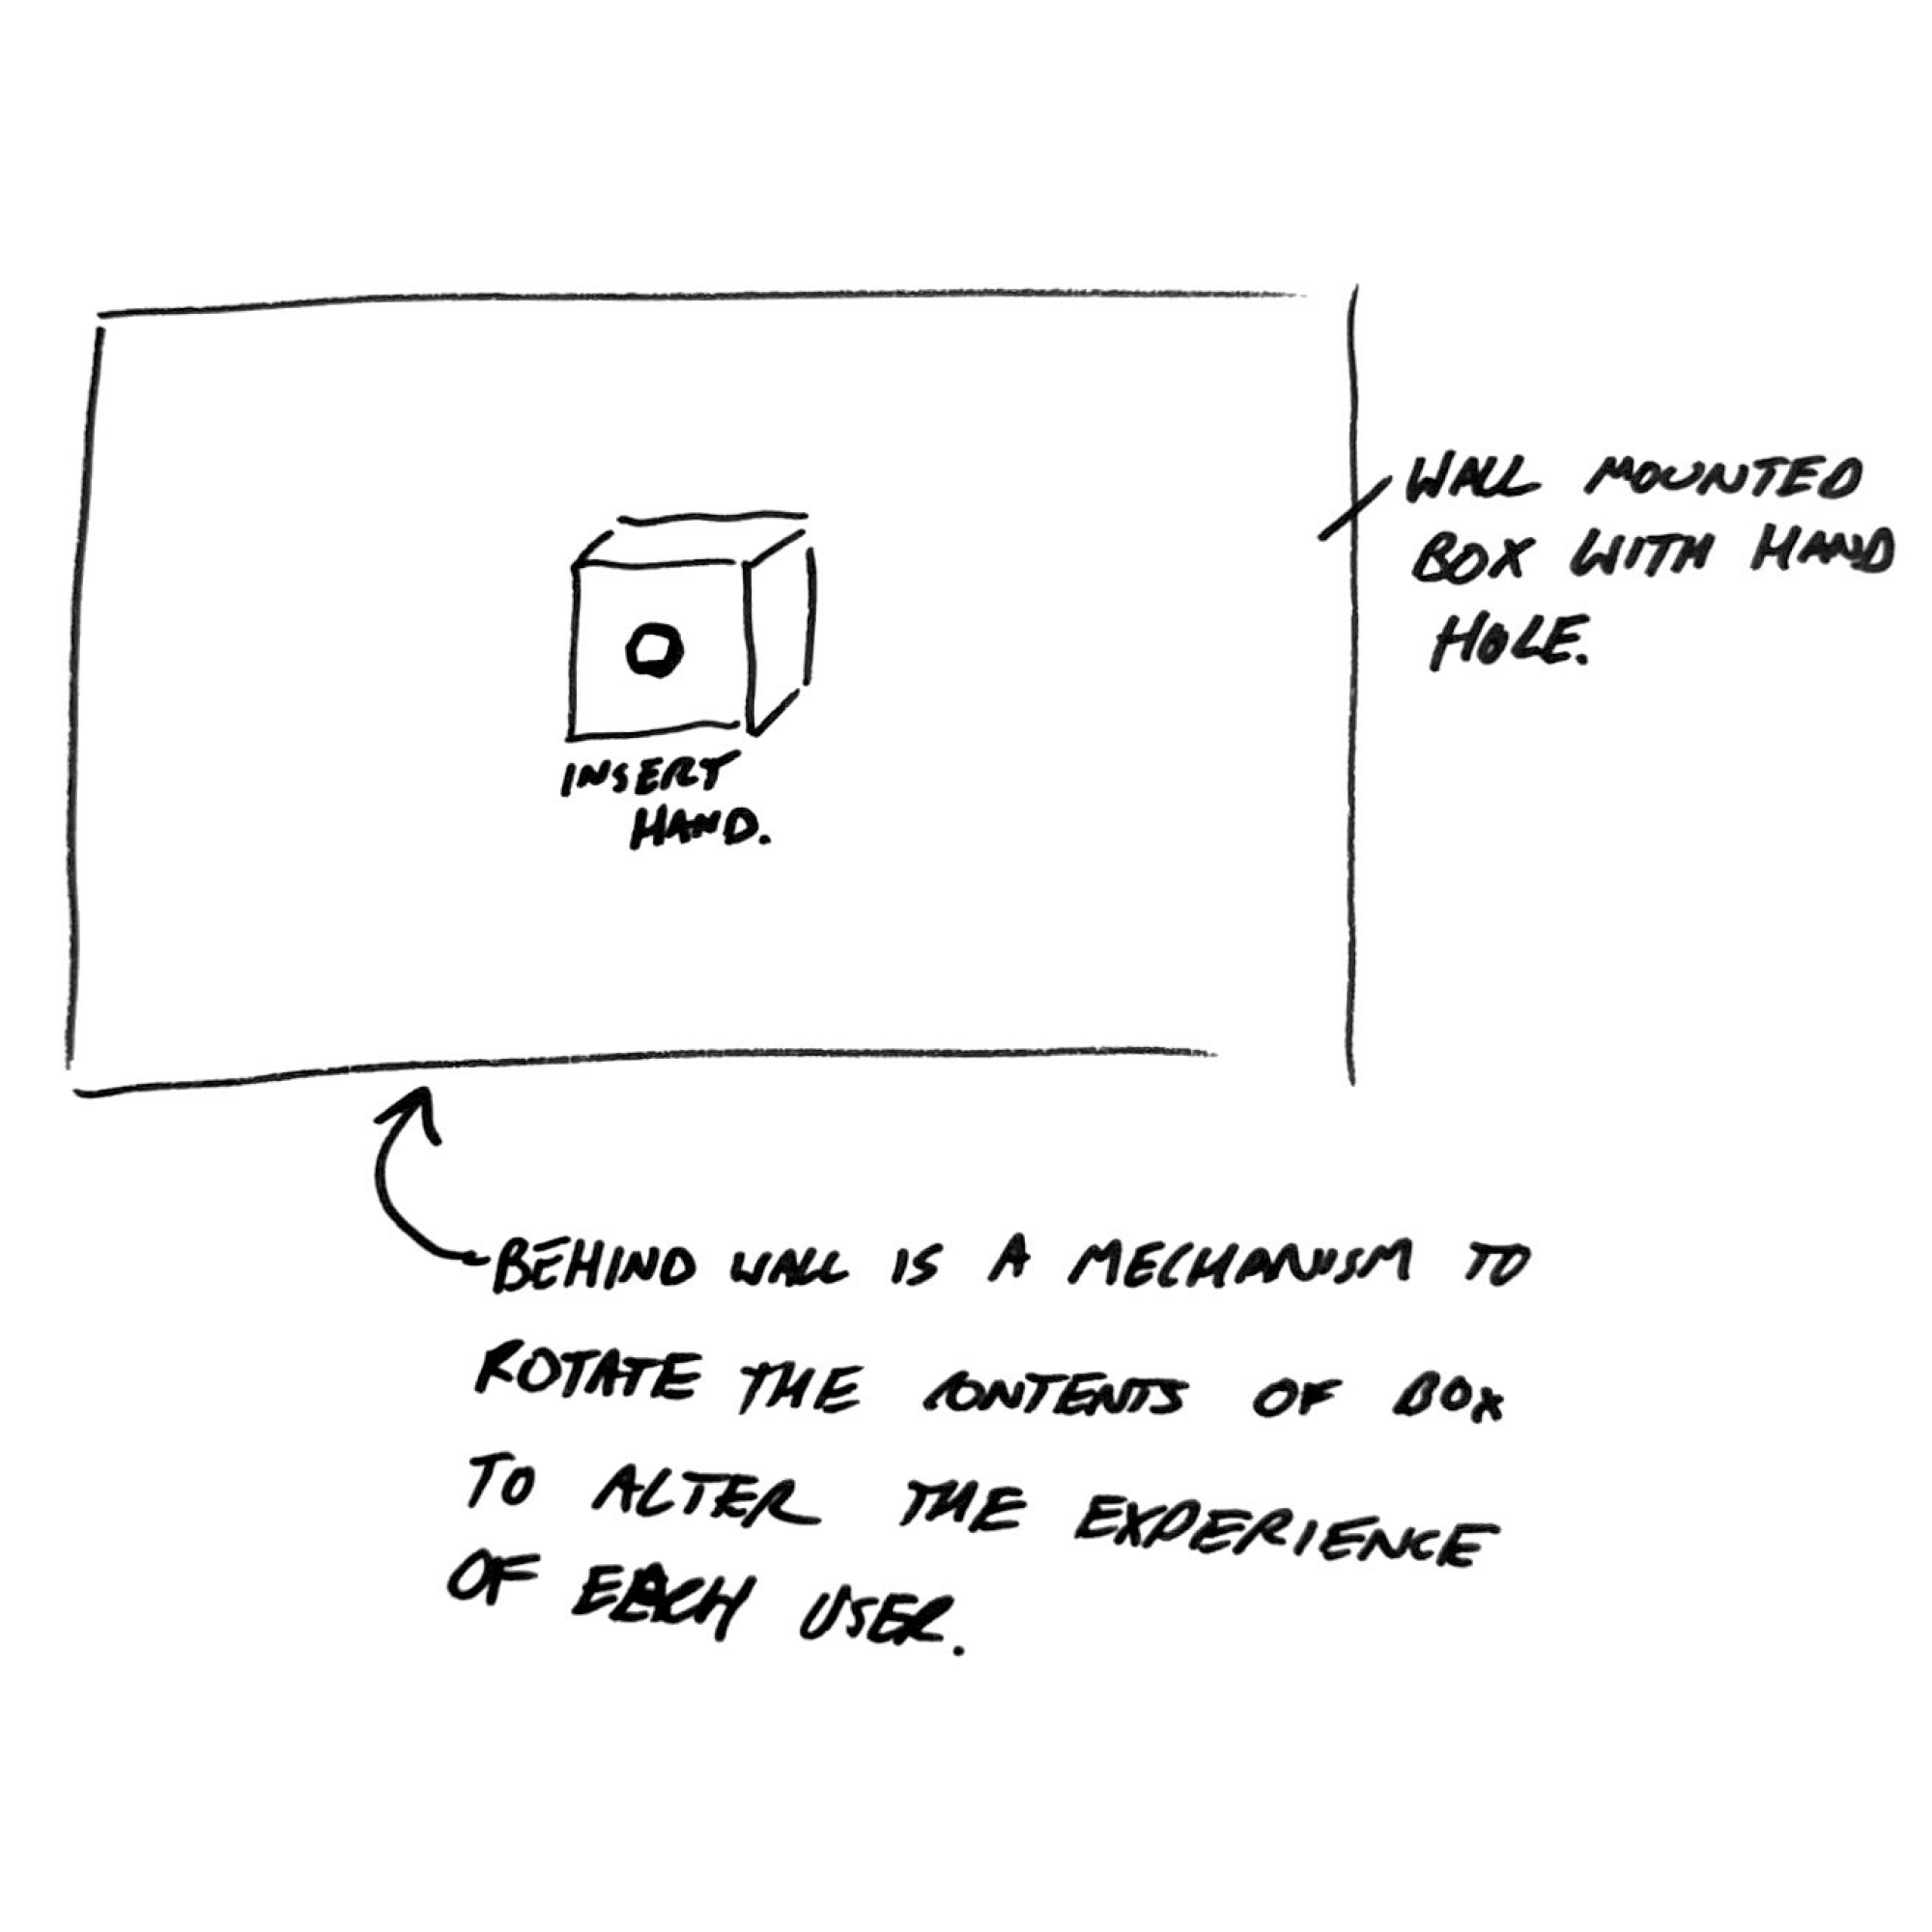
What’s in that box?
Imagine a 18” square wooden box mounted on a wall. There’s a hole just big enough for your hand on it’s front face and some simple instructions to insert hand and feel around. The observer follows the instructions -- “Eww!” they say. “It’s soft, gooey, cold and maybe even a little wet!” He’s clearly repulsed but definitely more so amused. His friend reaches in and pulls back just as quickly. “It’s not cold! It’s kinda sharp and kinda warm! What the hell!? You lied! I never would have stuck my hand in there if you had said it was sharp!”
Something like this could come to life with a mechanism hidden behind the wall that rotates the contents of the box after each observer has an opportunity to try the box. It could allow for a lot of observers to have unique experiences that raise questions over any of their reporting and authenticity of their subjective take. Concept 2 How heavy?
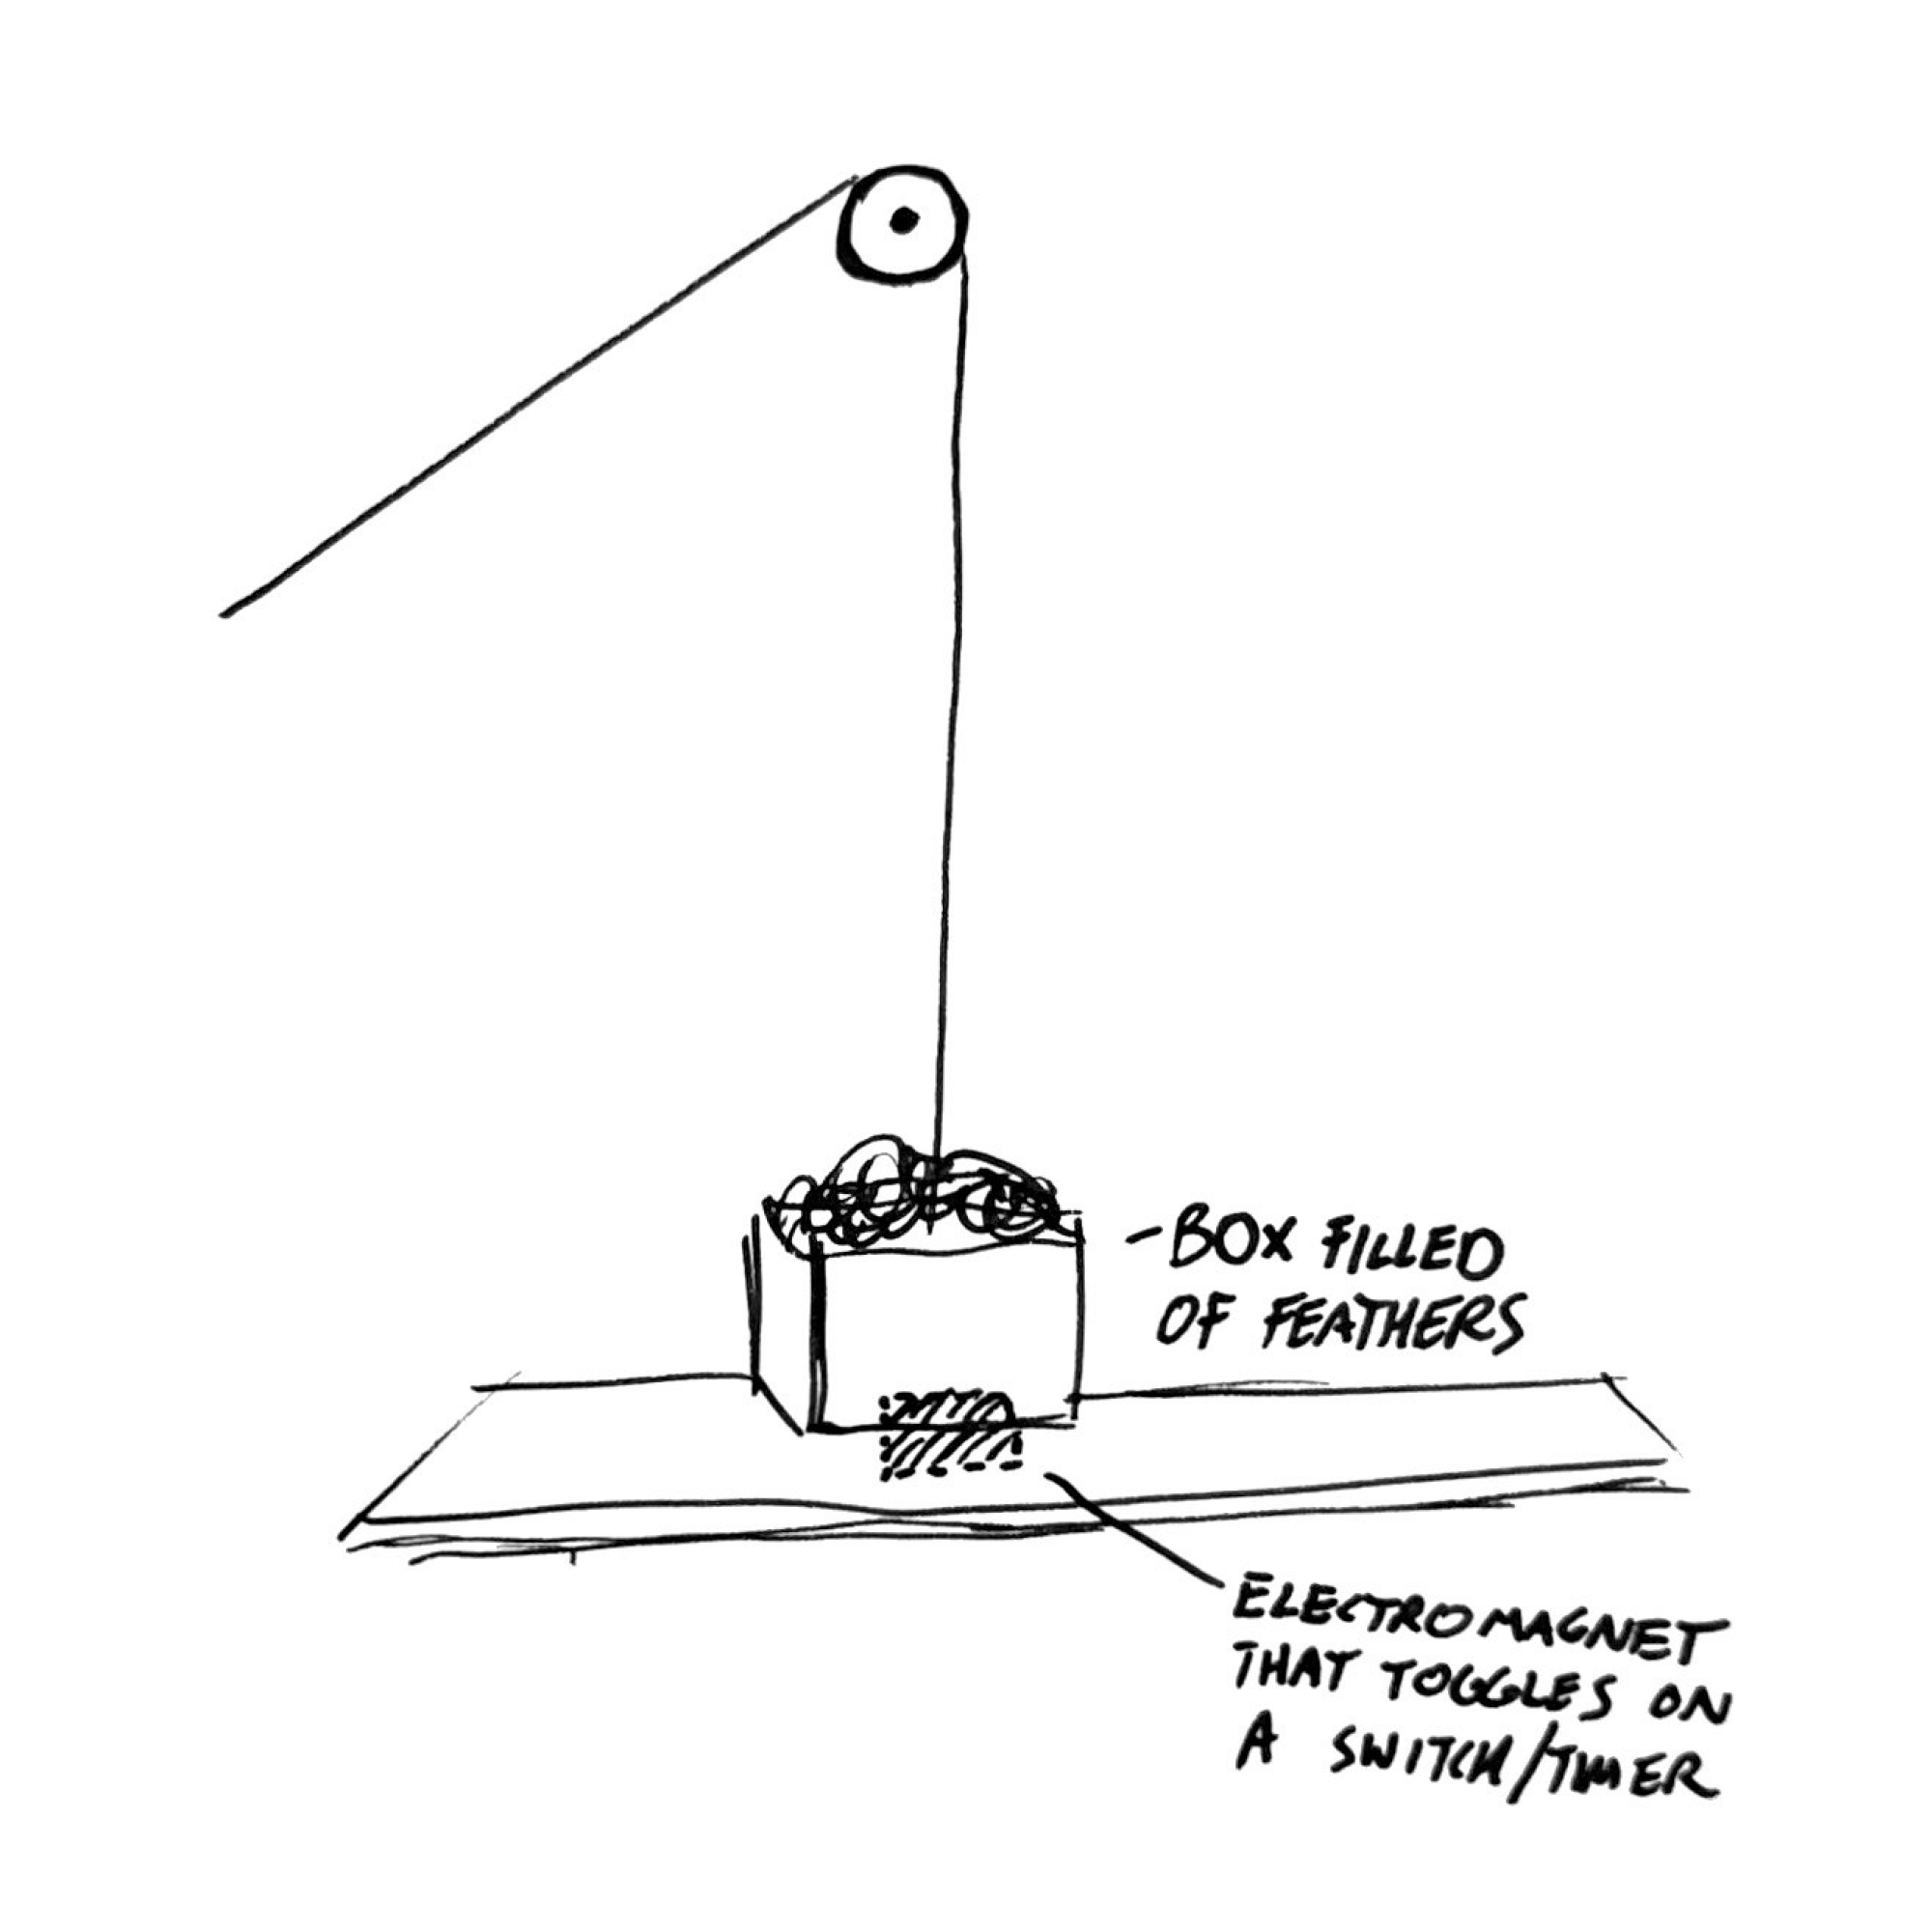
Playing on the same theme of shared experience, this concept is also meant to challenge subjectivity and objectivity. The piece consists of a small open top box that appears filled with feathers. It’s mounted to a rope that is strung over a pulley and then mounted to be accessible to the observer. Outside of that, the observer shouldn’t notice much more. Guests are instructed to pull the rope to lift the box and give an estimate of it’s weight. Unbeknownest to the observers, there is a series of electromagnets that toggle on and off to apply a measured amount of resistance on the box and the platform it sits upon.
Concept 3 Sneaky Cube
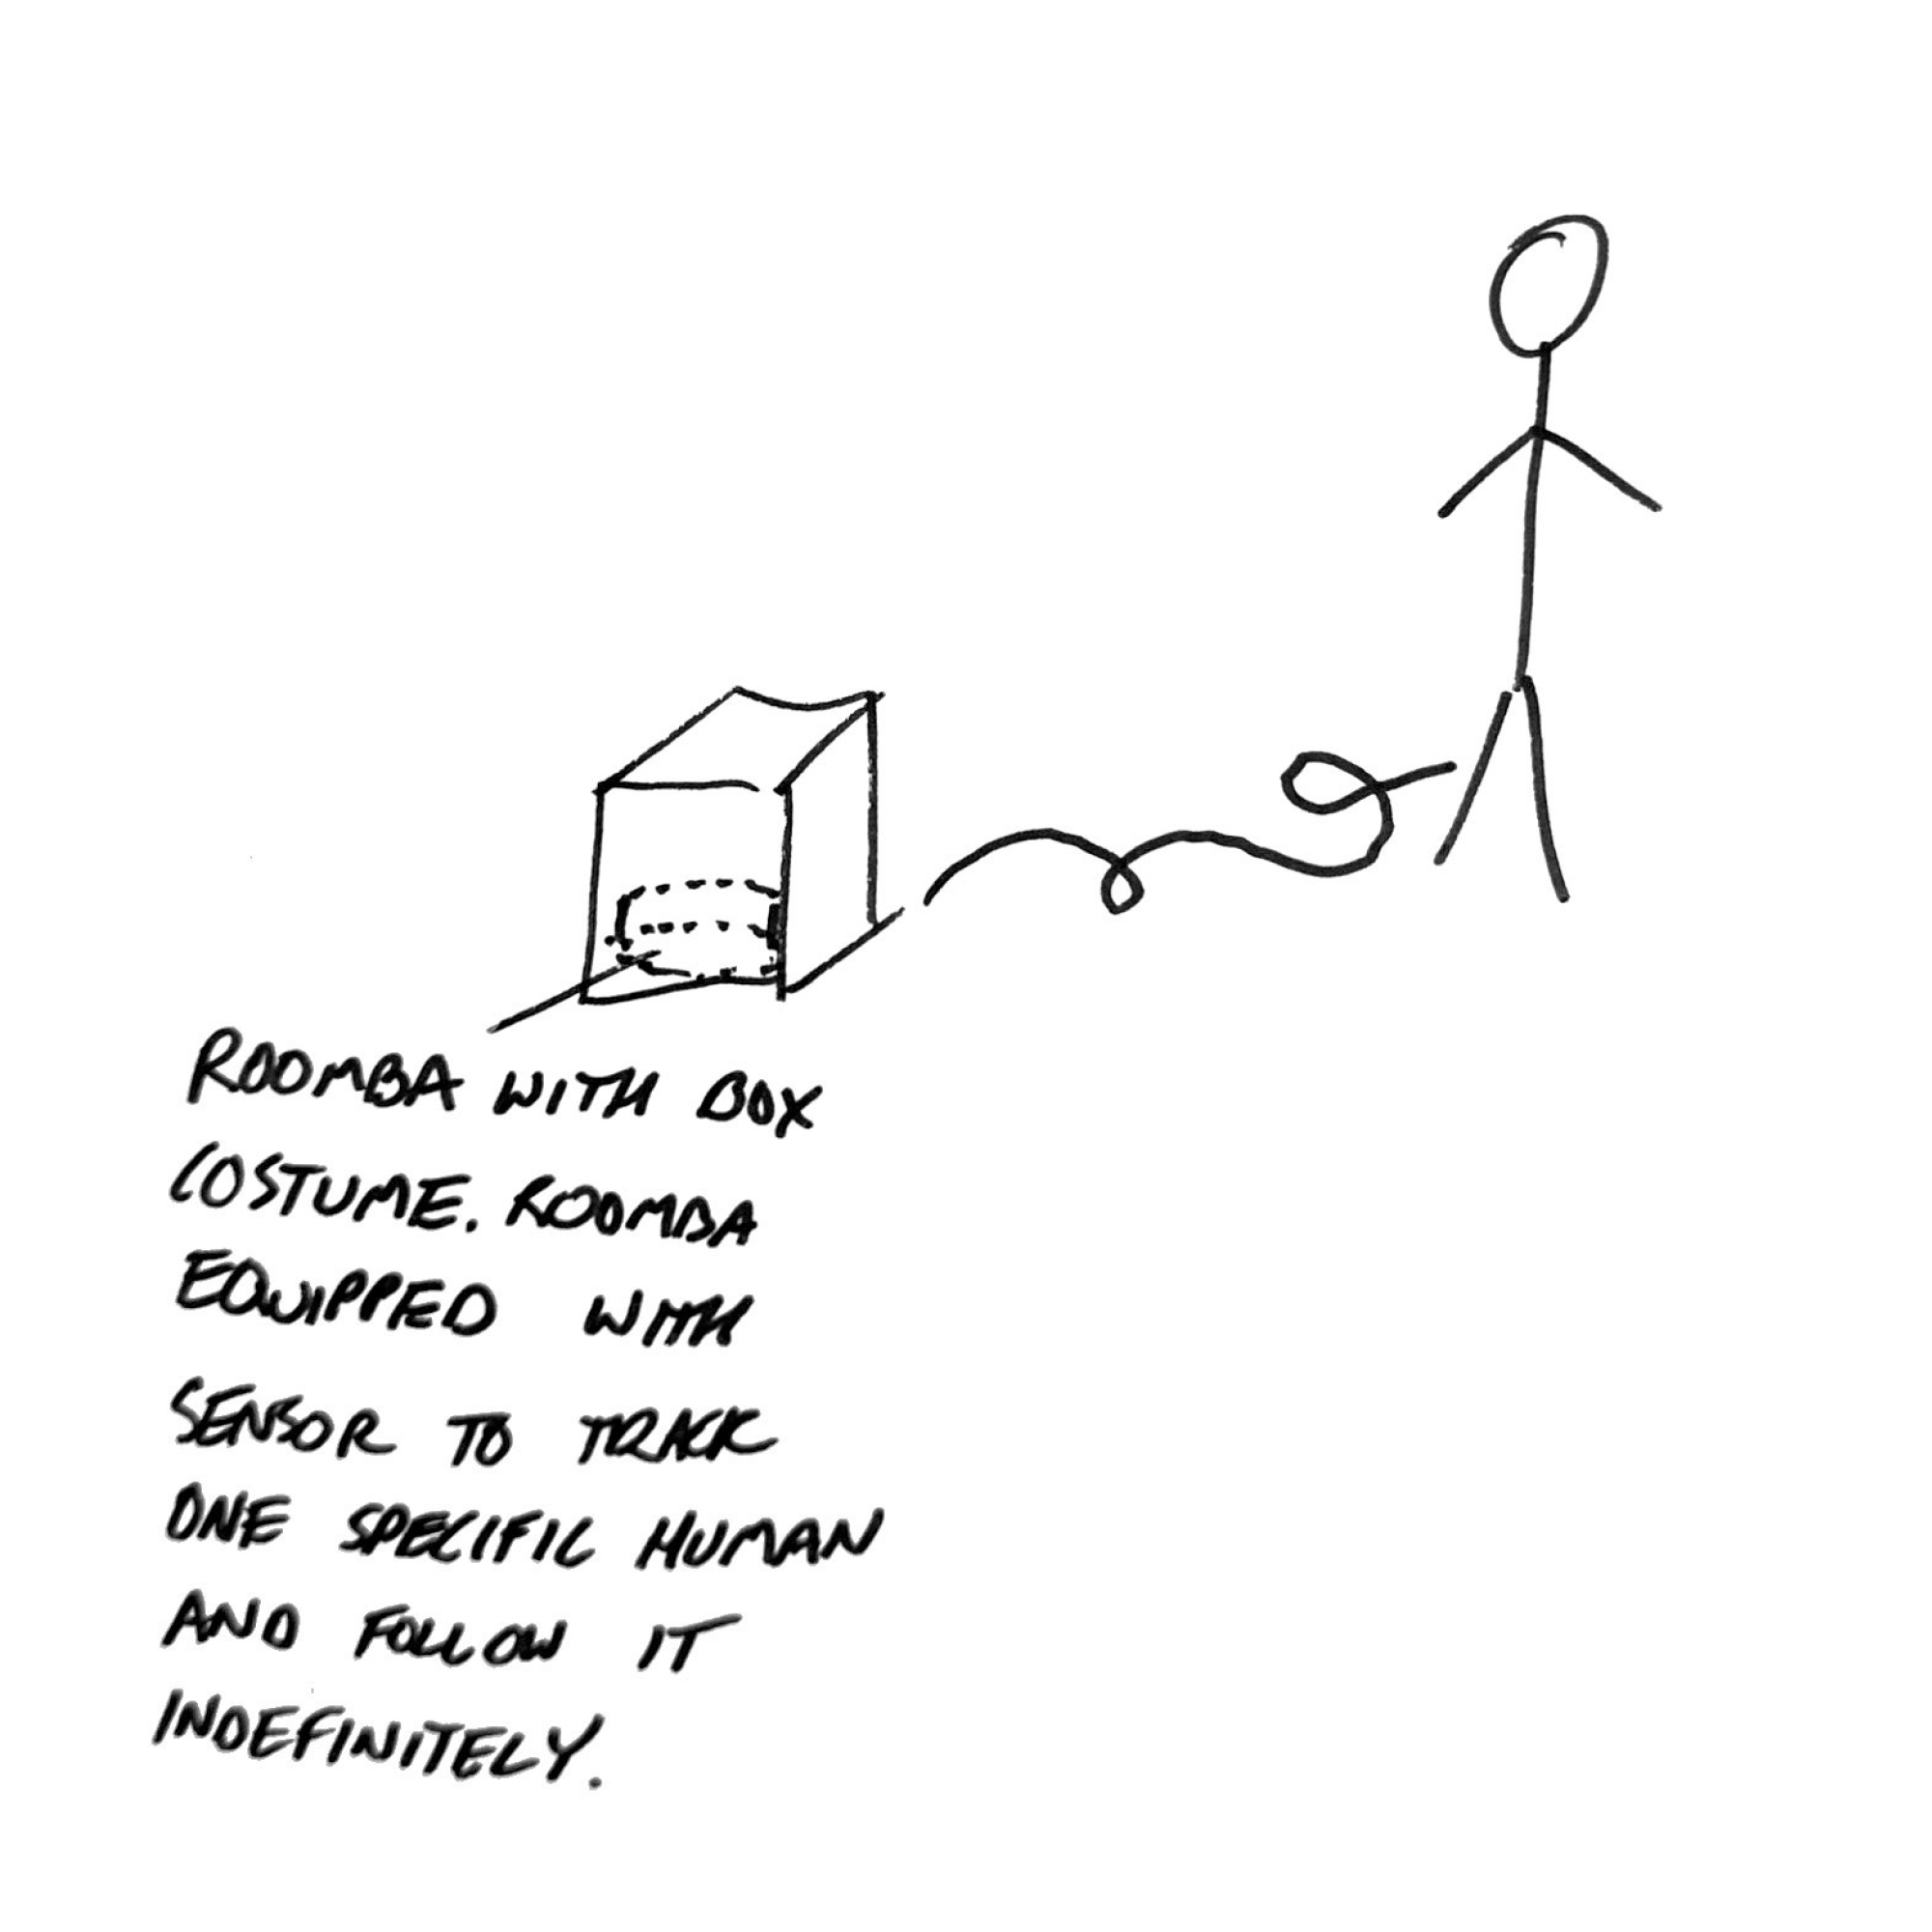
This concept comes to life by hacking a roomba and modifying it in a few ways. I’d remove all of the vacuum functions and strip it down to it’s critical components which don’t even include it’s motherboard – I’d swap that with an Raspberry Pi Pico. Then I’d build an infrared camera and light into it. Lastly, I’d encase the whole thing inside of a wooden cube so that the whole thing looks completely innocuous but still intriguing. The camera and light would need to be mounted on this surface but could be hidden well, I think. I’d configure the camera to seek out any bright infrared sources and move towards it. When switching it all on, I’d mount a small infrared reflective dot on my shoe so that the infrared light from the cube bounces off my IR reflective dot and back to the camera. When the camera picks up on the dot, it would be instructed to travel towards it. If all goes to plan, the roomba would indefinitely follow me. I might need to also use a TOF sensor to ensure the roomba follows at a safe but consistent distance. 25 February 2025Curious Cube Update
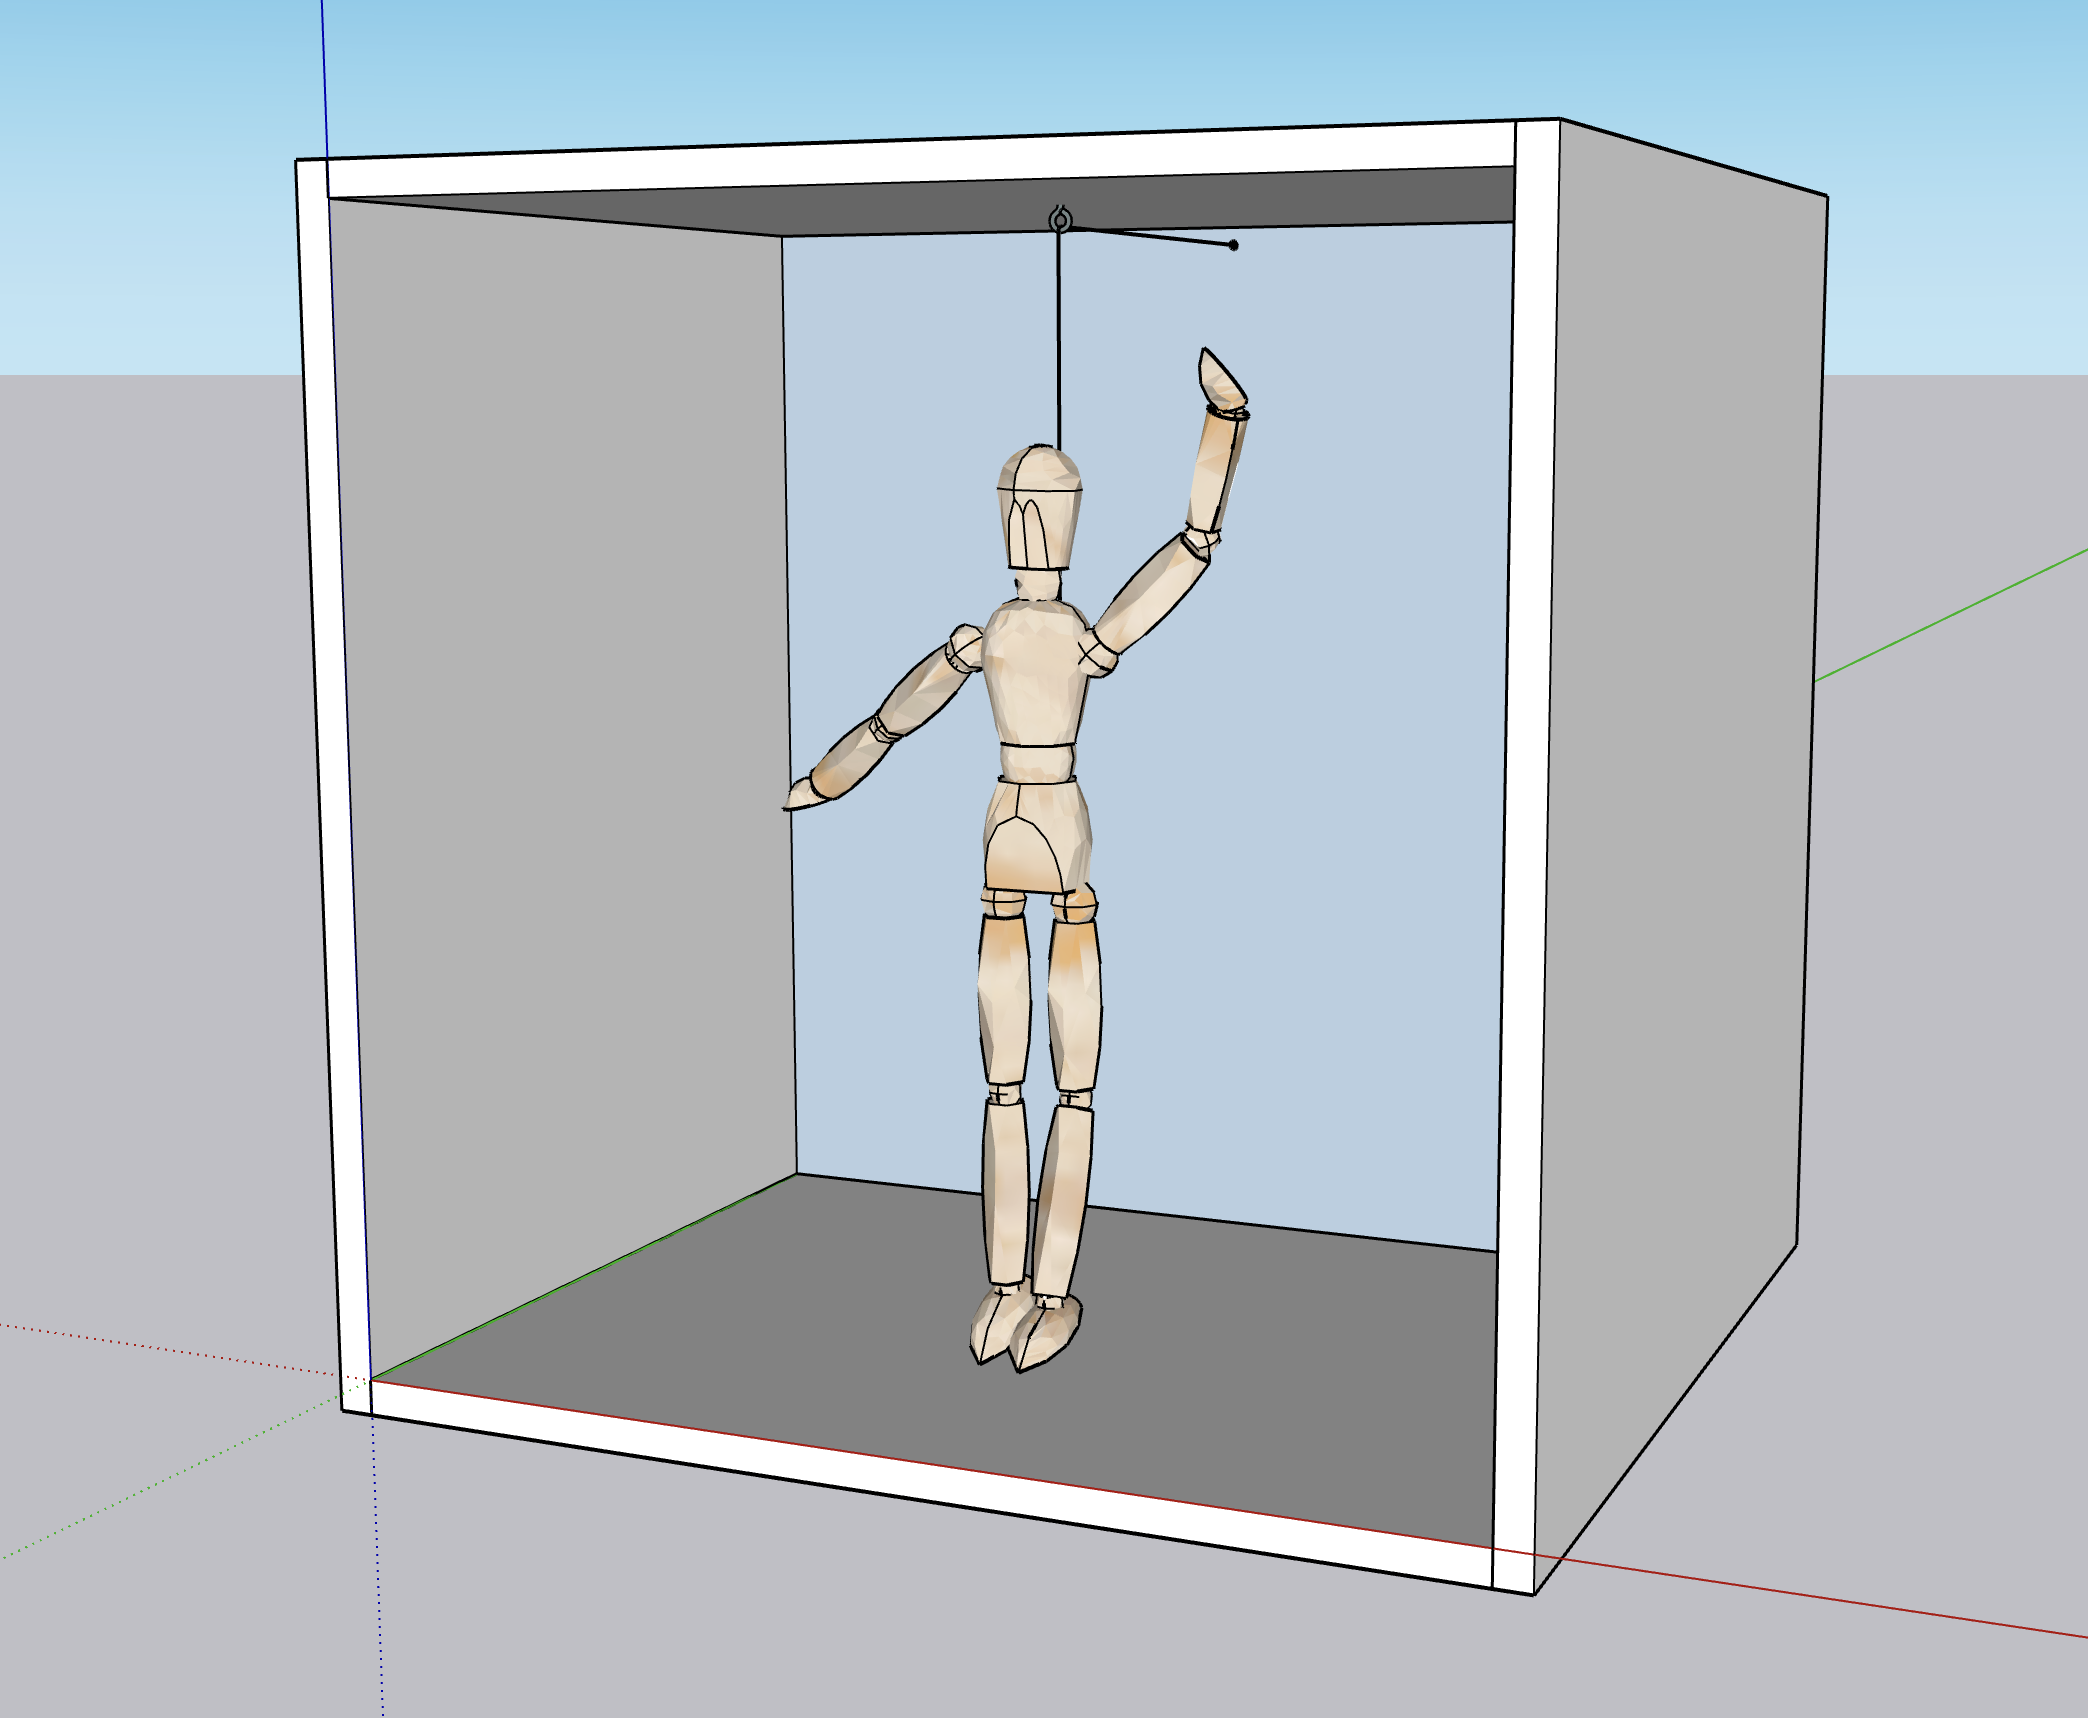
My curious cube contains a representation of myself. I've spent a lot of time making lofty projects that don't feel super relevant to my own personal lived experience and for this one, I tried to change reframe things a bit. In the cube is a movable figure that defaults to a crumbled position. When you approach it, however, the figure quickly and confidently stands upright and faces the observer. With this simple interaction, I sought to metaphorically highlight the dichotomy of how it feels to feign composure in the face of people and feel flat behind closed doors.
The project's fabricated components were built with a deconstructed wooden figure from Ikea and the box itself is built from 1/2" birch plywood scraps. The box itself measures 16"x 12" x 16". I removed most of the springs and hardware (responsible for its articulation) from the wooden figurine so that I could pass some thin string through the entirety of the body. This gave me the ability to control the body from a single tug of a string.
I plan on integrating a ToF sensor to recognize when an observer is standing within ~3' of the box and a stepper motor to control a rapid retraction and loosening of the string. When working in tandem, the intangible interaction should ideally work pretty seamlessly.
Outside of the functional and structural bits, I'd like to alter the form of the box to give it less of an off-the shelf look. I may use paint and plaster to treat the walls of the box if time permits.
I'm curious if the metaphor will feel intuitive. Looking forward to some testing.
CAVEAT: Some of this is a repeat of my previous week's documentation w/r/t explaining this project. Also, the title is borrowed from Walter DeMaria.
In this box contains the spirit of a young man's heart (r2)
Project Description
My curious cube contains a representation of myself. I've spent a lot of time making lofty projects that don't feel super relevant to my own personal lived experience and for this one, I tried to reframe things a bit. In the cube is a movable figure that defaults to a crumbled position. When you approach it, however, the figure quickly and confidently stands upright and faces the observer. With this simple interaction, I sought to metaphorically highlight the dichotomy of how it feels to feign composure in front of others and feel flat behind closed doors.
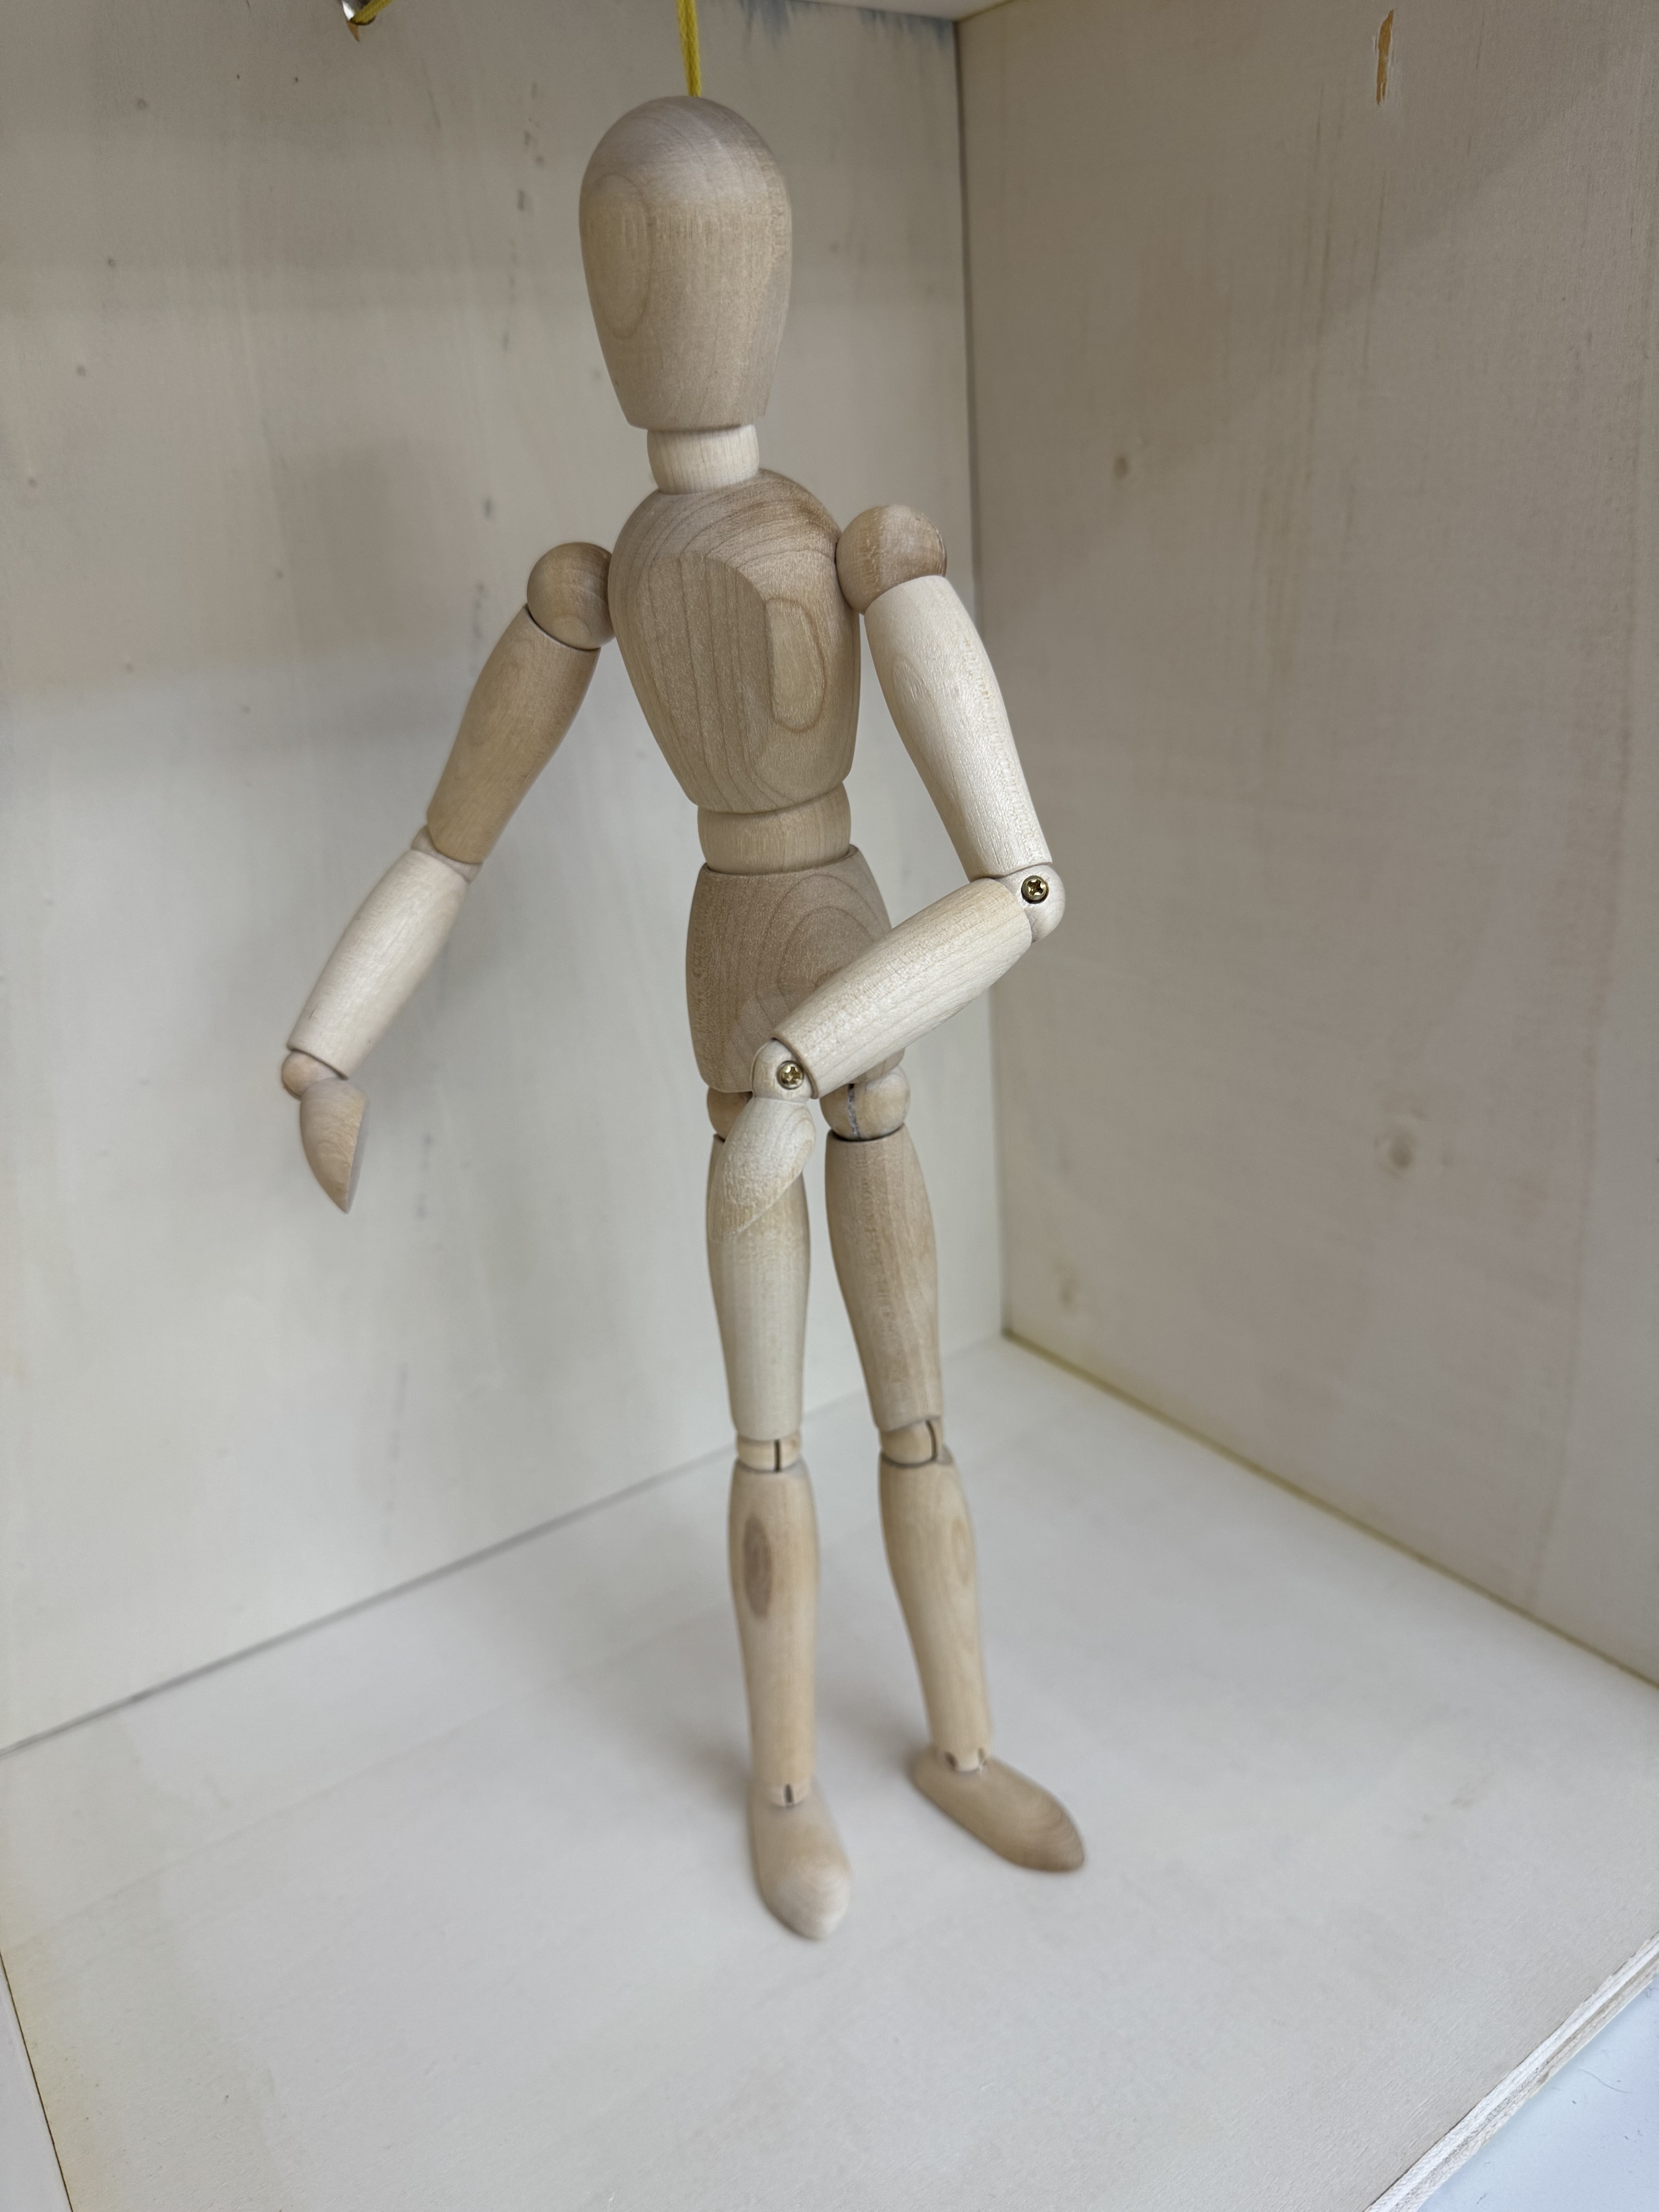
Early Testing
The project's fabricated components were built with a deconstructed wooden figure from Ikea and the box itself is built from 1/2" birch plywood scraps. The box itself measures 16"x 12" x 16". I removed most of the springs and hardware (responsible for its articulation) from the wooden figurine so that I could pass some thin string through the entirety of the body. This gave me the ability to control the body from a single tug of a string.
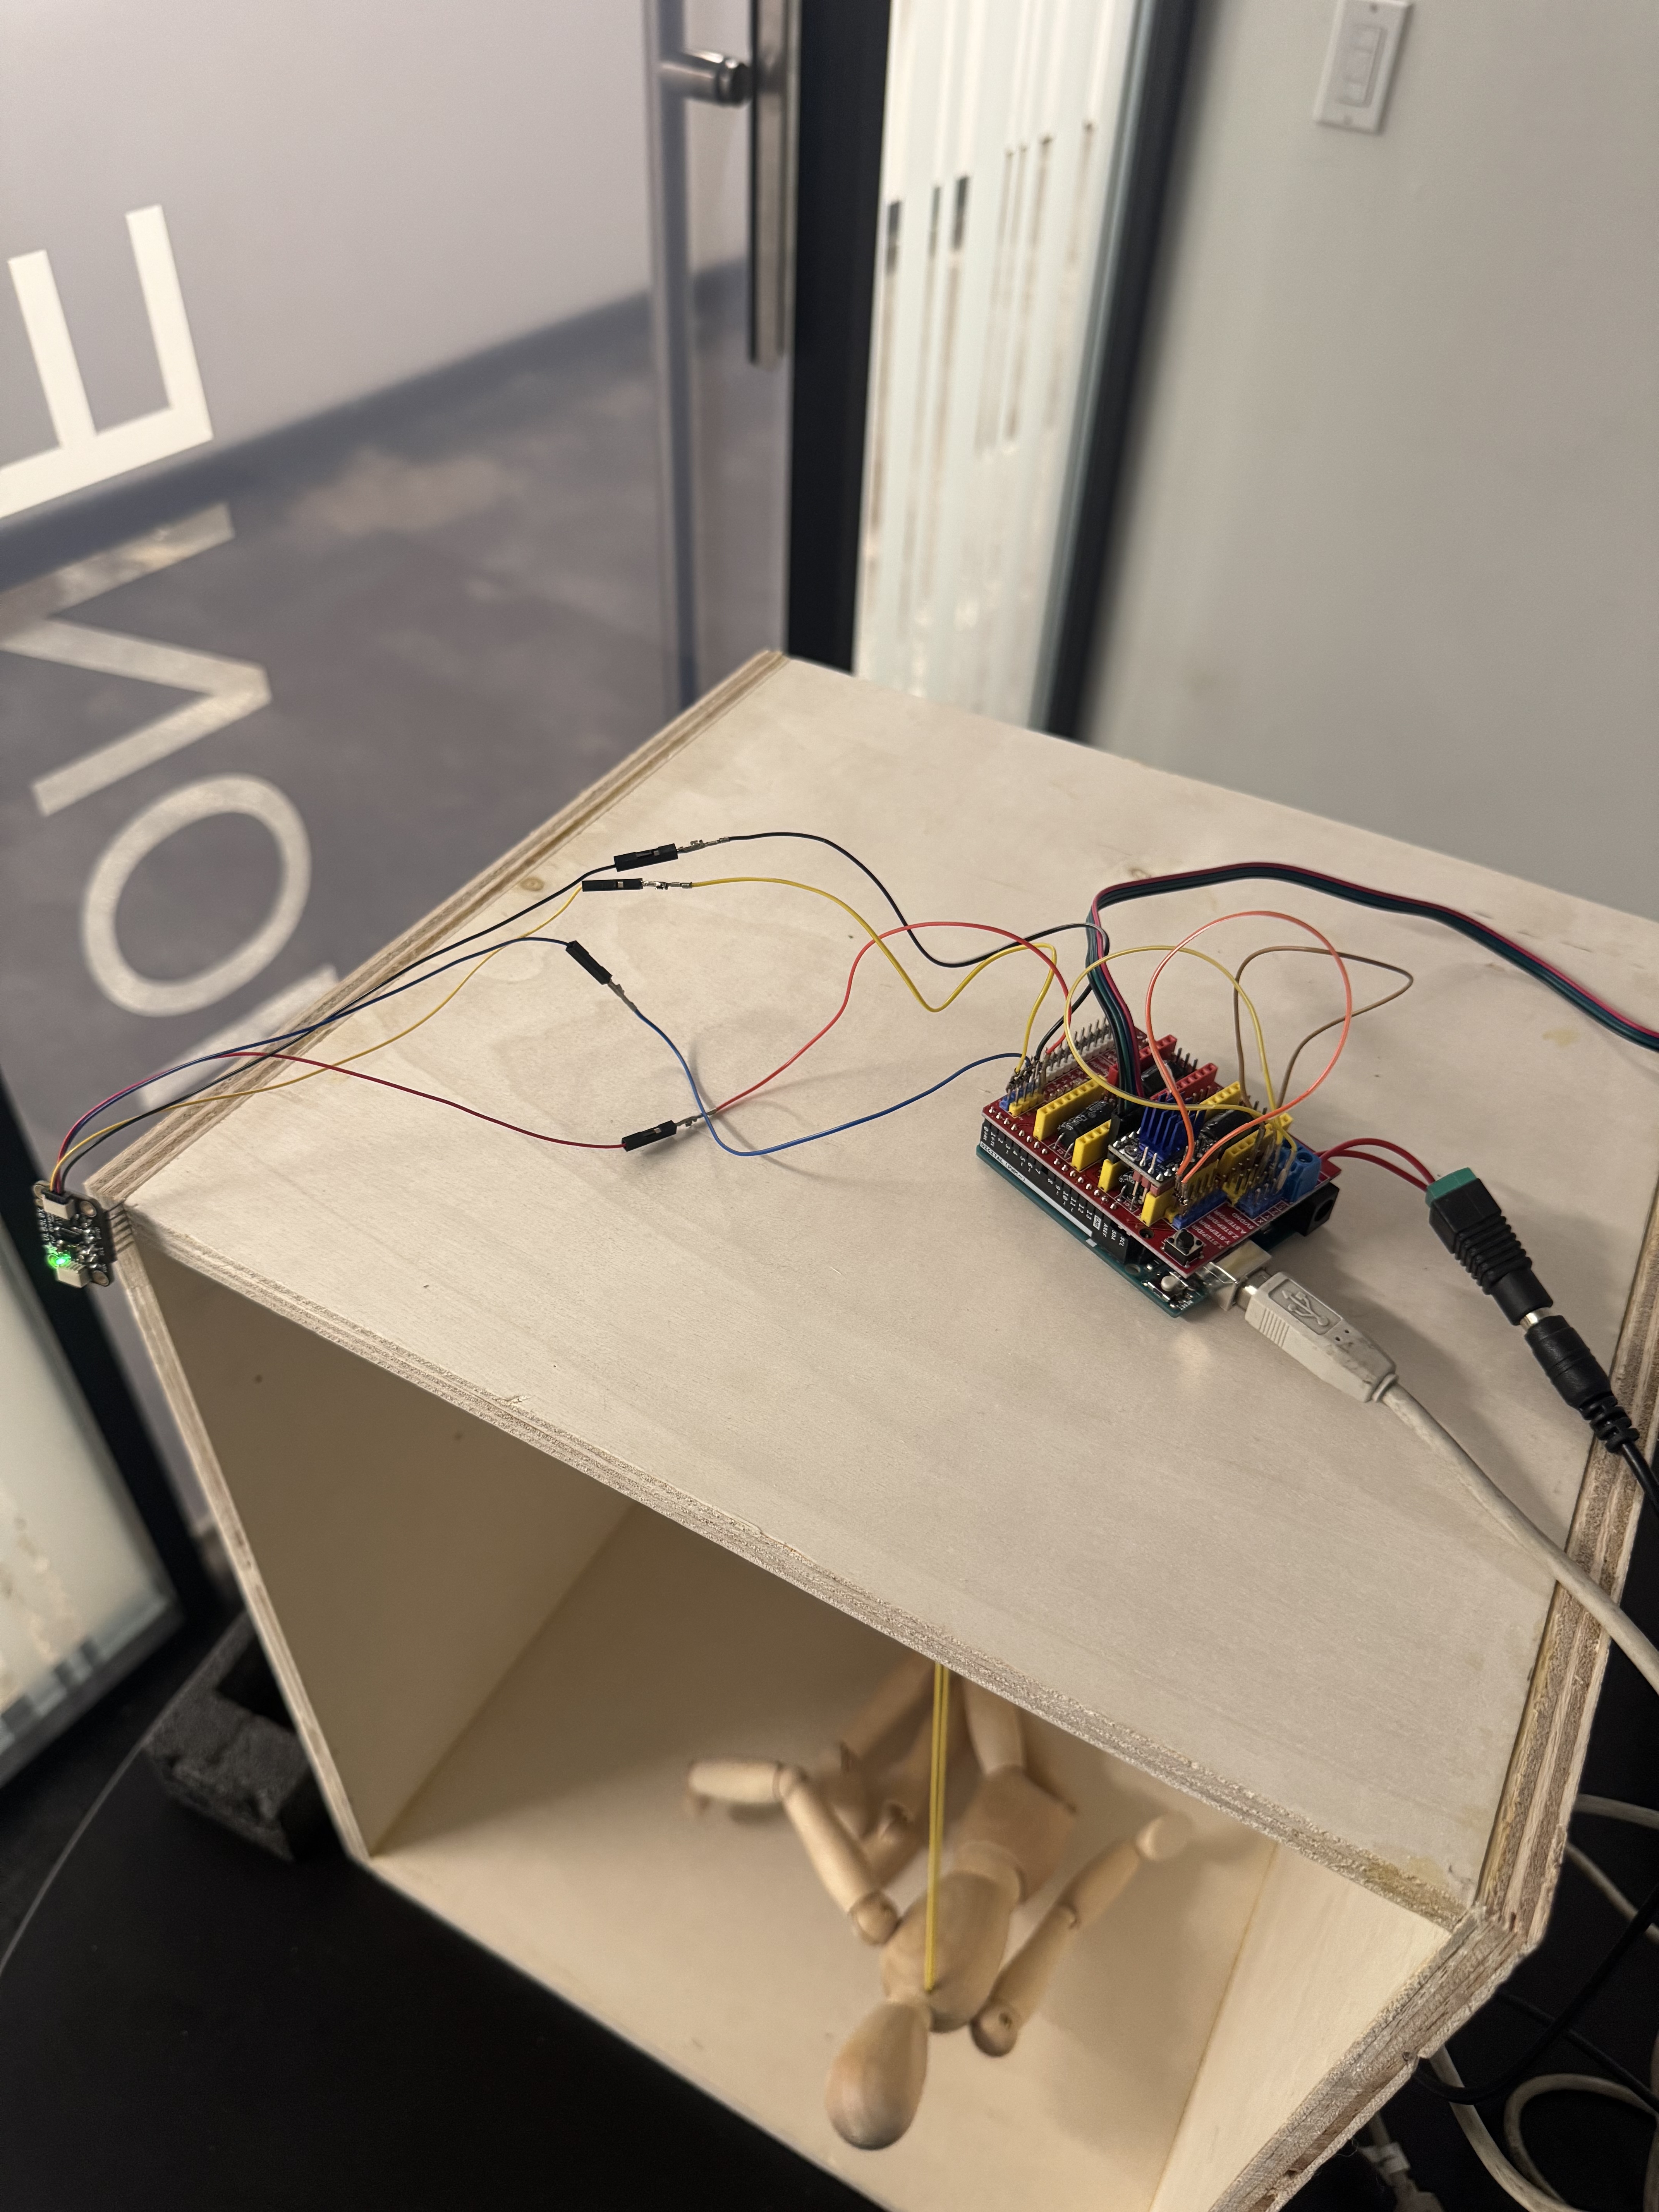
Building the Final Version
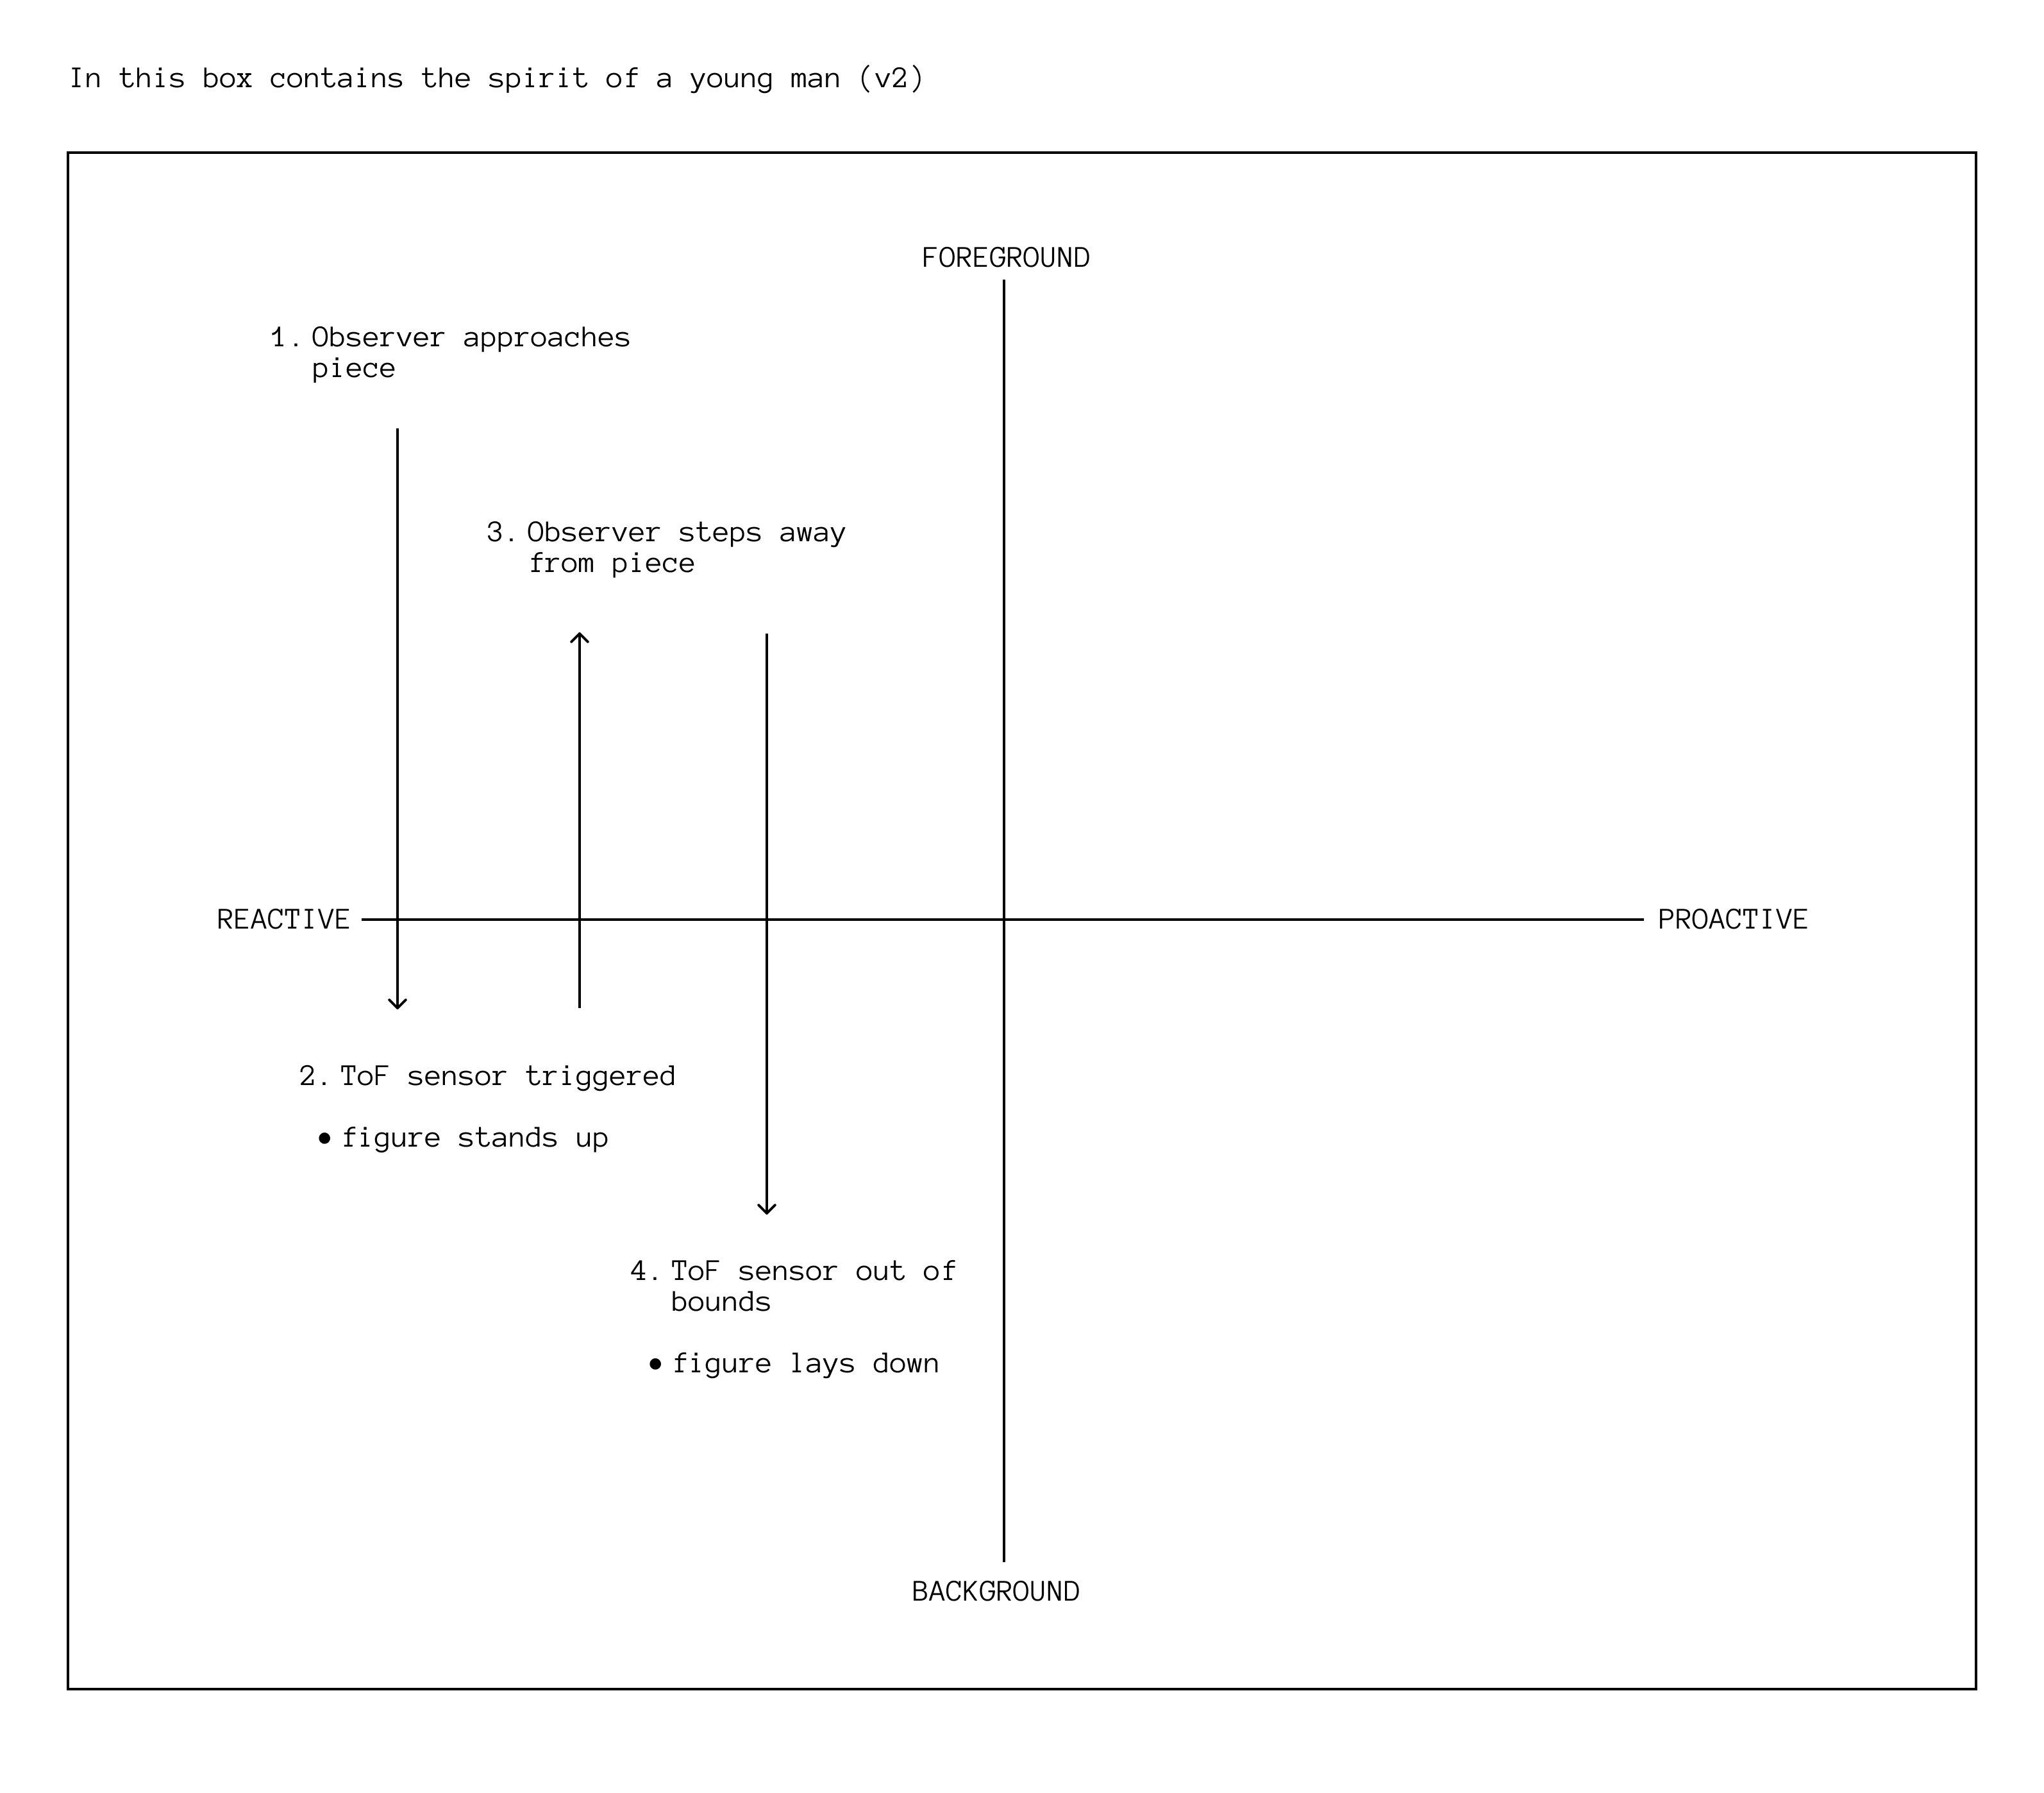
There is a ToF sensor (VL53L0X) that controls how the system recognizes when there is an observer which triggers the primary interaction of the piece. I'm using a CNC Shield (HiLetgo A4988) sitting atop a Arduino (Uno R3) to control my stepper motor (Usongshine Nema 17 42BYGH).
When someone approaches the cube and stands within 500mm of the front of the it, the ToF sends a signal to the Arduino to wind the stepper motor. It's approximately 2.75 turns of the stepper motor which equates to 4469 steps of this particular stepper motor. After a while it does encounter some step lossage which could probably be fixed with some sort of calibration function built into the mechanics. For now though, this works pretty reliably. When someone steps away from the device and during all of the device's downtime, the figure will lie flat on the surface of the box.
Through user testing, people have generally understood the meaning of the piece although it was a big more successful in early user testing (before the motor was installed) because the action of lift and drop was much more rapid. If I were to build this again, I could likely solve it with gear drives to hasten the pace of the string. Or something more complicated related to electromagnets may be possible.
Outside of the functional and structural bits, I'd like to alter the form of the box to give it less of an off-the shelf look. I may use paint and plaster to treat the walls of the box if time permits.